Unlock Your Summer Style: Creative No-Sew & Low-Sew DIY Clothing Transformations
Recent data indicates that consumers spend an average of $161 per month on clothing, often accumulating pieces destined for minimal wear or eventual disposal. Yet, with a full closet of existing garments, why purchase new trendy summer clothes when you can easily transform your current wardrobe? The accompanying video provides a fantastic glimpse into budget-friendly, no-sew, and low-sew fashion hacks, illustrating how readily available items can become stylish summer essentials. We are diving deeper into these ingenious DIY methods, empowering you to create unique pieces without breaking the bank or requiring extensive crafting skills.
Revitalize Your Wardrobe: Creative No-Sew Tank Top Transformations
The video effectively demonstrates how to turn a basic, unworn tank top into a chic, tied-front crop top in mere minutes. This simple yet impactful transformation begins by selecting a tank top from your closet that currently sees little to no wear. While any tank top works, those made from cotton or jersey blends offer superior ease in cutting and draping. First, determine your desired crop length; a precise measurement ensures a flattering fit.
After carefully cutting the bottom section off, you now possess a new crop top and a strip of leftover fabric. Do not discard this remnant! Instead, you can fashion a stylish, long ribbon from the remaining material. Cut the fabric into a continuous strip, tapering the ends into neat points for a more polished aesthetic. This ribbon then slips effortlessly underneath your newly cropped tank top, allowing for versatile styling options. You might tie a simple knot, craft an elegant bow, or let the ends hang loose for a relaxed, bohemian vibe, completely altering the garment’s appearance.
Styling Your New Crop Top
This versatile crop top pairs wonderfully with high-waisted shorts, skirts, or jeans, creating a balanced silhouette perfect for warm weather. Consider layering it over a slip dress or under an open button-down for a more complex and fashion-forward ensemble. Experiment with different tank top colors and fabrics, perhaps even incorporating patterns, to expand your collection of DIY trendy summer clothes. This simple hack truly showcases how quickly you can refresh your summer wardrobe.
Elevate Your Swimwear: Strappy Bikini Bottoms DIY
Many bikini trends feature intricate strappy details, often at a premium price. However, you can replicate this high-fashion look using an existing bikini, as the video brilliantly demonstrates. If you own a bikini where you adore the bottoms but dislike the top, this project offers the perfect solution. Begin by salvaging the straps from the unwanted bikini top; these pieces already match your bottoms, ensuring a cohesive design.
Measure the straps around your hips, determining the ideal length for the desired strappy effect. Cutting them to size is crucial for a comfortable and secure fit. Subsequently, these newly cut straps require attachment to the front and back centers of your bikini bottoms, typically creating an appealing ‘V’ angle. For this crucial step, two primary attachment methods are suitable.
Secure Attachment Methods for Swimwear
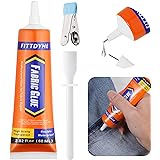
You might opt for a heavy-duty fabric glue, specifically designed for swimwear and outdoor use. The video highlights glues offering “super heavy-duty power,” though some require up to 24 hours to fully dry and cure, a vital consideration for durability. Alternatively, if you prefer a no-chemical approach or require immediate wear, a needle and thread provide a reliable solution. Hand-stitching with strong, water-resistant thread ensures the straps remain securely in place, even after repeated exposure to water. Always prioritize strong adhesion for swimwear, regardless of your chosen method, as integrity in the pool or ocean is paramount.
Fashion Forward: Crafting a Bardot-Style Off-the-Shoulder Top
The enduring appeal of Bardot-style tops, with their elegant off-the-shoulder sleeves, makes them a timeless summer staple. Recreating this sophisticated look from a regular long-sleeve shirt is surprisingly straightforward, as demonstrated in the video. Start with a long-sleeve shirt that you no longer wear; materials like cotton, jersey, or even a soft knit work best, providing a comfortable drape. The initial step involves cutting the top portion of the shirt horizontally, effectively transforming it into a basic tube top.
For a more secure and body-hugging fit, particularly around the bust, consider tailoring the tube top. Cut it vertically down the middle, then remove a few inches from each side. Rejoining the cut edges with fabric glue creates a tighter silhouette. The presenter notes allowing approximately 30 minutes for the glue to dry, ensuring a strong bond. After securing the main body, direct your attention to the sleeves you previously removed.
Attaching Your New Bardot Sleeves
From the wrist end of one sleeve, cut off a section, typically 3-4 inches, adjusting for your arm circumference. Try it on to confirm a comfortable fit around your upper arm. Once your tube top is fully dry and secure, align the seam of the trimmed sleeve with the seam of the tube top. You have the flexibility to either stitch it firmly in place or use the same reliable fabric glue, both methods yielding successful results. This clever upcycling project creates a stylish top resembling purchased items but with a personal touch, proving that achieving a high-end look is possible with simple DIYs and a little patience. The video creator even notes that this project took her just 40 minutes, including drying time!
Bold & Beautiful: DIY Ring-Detailed Tube Top from Leggings
Ring-detailed tube tops are undeniably chic, adding an intriguing focal point to any summer outfit. You can easily replicate this trendy design using an old pair of patterned leggings, transforming them into a unique statement piece. The video showcases this innovative approach, emphasizing the potential of repurposing often-overlooked garments. Select a pair of leggings whose pattern you admire but rarely wear in public; their stretchy fabric makes them ideal for this transformation.
Begin by cutting the legs off the leggings, retaining only the cylindrical leg sections. These will form the main body of your tube top. The essential component for this DIY is a sturdy ring, which could be a bangle bracelet, a metal O-ring, or even a shower curtain ring if you seek an economical option. Place your chosen ring flat on a surface. Next, take one of the pant legs and feed its widest part (the thigh section) through the ring.
Securing Your Ring Tube Top
Crucially, feed only a small portion of the fabric through the ring, ensuring ample material remains on either side to tie at the back later. To secure the fabric flap around the ring, you have two reliable options: stitching or fabric glue. The video highlights specific waterproof and strong fabric glues that work across various fabric types, not just cotton. Allow approximately 30 minutes for the glue to thoroughly dry and cure, creating a durable hold. Once dry, tie the remaining fabric lengths at the back, adjusting for a snug and comfortable fit. This inventive design truly performs well; the presenter even wore her finished ring top to the pool, reporting that the glue held strong, showcasing remarkable durability.
Accessorize with Flair: Crafting Patterned Scrunchies from Fabric Scraps
Large, patterned scrunchies are a delightful accessory, adding a pop of color and texture to any hairstyle. You can easily create these charming items from the leftover fabric scraps of other DIY projects, as the video demonstrates. This practice is not only cost-effective but also a fantastic way to minimize textile waste, aligning perfectly with sustainable fashion principles. The process starts by obtaining a strip of fabric, ideally from a dress or shirt that has seen better days or has been upcycled.
Once you have your fabric strip, thread a piece of elastic through its length. For a comfortable and secure scrunchie, the elastic should be slightly shorter than your fabric strip, allowing the fabric to gather. Join the ends of the elastic together with a few light stitches, forming a continuous loop. Subsequently, fold the fabric inwards, encompassing the elastic, and apply fabric glue along the edges to secure them.
Creating Various Scrunchie Styles
Allow the glue to dry completely; this critical step ensures the scrunchie’s longevity. Following this simple process, you will have a beautiful, puffy scrunchie, perfect for adorning your hair or wrist. The presenter even showcases making both large, voluminous scrunchies and smaller, less puffy versions from different fabric scraps, including remnants from a dress previously used for a scarf. This highlights the versatility of fabric scraps and encourages continued creativity. Making these delightful accessories is a fun and rewarding way to use up every last piece of fabric, contributing to a more circular fashion economy.
Embracing Sustainable Style with DIY Trendy Summer Clothes
Embracing DIY trendy summer clothes not only offers a personalized approach to fashion but also significantly contributes to sustainable living. By repurposing old garments into fresh, contemporary pieces, you actively reduce textile waste and decrease demand for new, often ethically questionable, fast fashion items. These no-sew and low-sew techniques empower you to continuously refresh your wardrobe, ensuring your style evolves without the constant need for new purchases.
Summer Fashion Unstitched: Your DIY Q&A
What kind of clothing transformations can I learn from these DIY projects?
You can learn to transform old clothes into trendy summer outfits like crop tops, strappy bikinis, off-the-shoulder tops, ring-detailed tube tops, and even scrunchies.
Do I need a sewing machine to complete these DIY clothing projects?
No, most of these projects are designed to be ‘no-sew’ or ‘low-sew,’ often using strong fabric glue or simple hand-stitching instead of a sewing machine.
What types of existing clothes can I use for these transformations?
You can use a variety of old garments such as tank tops, long-sleeve shirts, leggings, bikini tops, and even fabric scraps from other projects.
What is fabric glue primarily used for in these DIY clothes hacks?
Fabric glue is a key tool used to secure seams, attach new pieces like straps or sleeves, and create strong bonds for a no-sew finish in many of these projects.
What are the main benefits of making my own clothes using these DIY methods?
DIYing your clothes helps you save money, reduce textile waste by repurposing old garments, and create unique, personalized items for your wardrobe.