Did you know that a single video about organizing your room can inspire over 4 million viewers? The desire for a tidy, functional living space is a universal aspiration, especially when spring cleaning rolls around. We’ve all been there: staring at a cluttered room, feeling overwhelmed by where to even begin. It’s that initial hurdle of just getting started that often feels like the biggest challenge, however, with the right approach and some creative DIY solutions, transforming your space from chaotic to calm is entirely achievable. This guide expands on the fantastic ideas presented in the video above, offering even more insights and practical tips for effective DIY room organization and a refreshing spring clean.
Far too often, our living spaces become reflections of our busy lives, collecting items that lack a designated home. While the video humorously highlights the struggle of a messy room, it also brilliantly demonstrates that with a bit of dedication and some clever crafting, anyone can create an environment that feels both organized and aesthetically pleasing. From clever laundry solutions to ingenious dresser top displays, the following sections will delve deeper into each organizational strategy, helping you not only clean your room but also personalize it in a way that truly brings you joy. Get ready to embrace the power of DIY and make your room a haven of order and style.
Conquering Clutter: The Art of Decluttering Your Room
Every successful room transformation begins with a thorough decluttering process, a step that is often underestimated in its importance. As the video rightly emphasizes, the floor can quickly become a disaster zone, accumulating everything from trash to misplaced treasures. Before you even think about organizing, it’s crucial to sort through every item. Imagine if you tried to organize a pantry without first removing expired goods and identifying what you actually need; the effort would be futile, and the mess would inevitably return. This foundational step isn’t just about tidying; it’s about creating mental clarity and making space for what truly matters.
Breaking down the sorting process into manageable categories can make this daunting task feel less overwhelming. Start by grabbing a few large bags or boxes and label them clearly: “Trash,” “Belongs Elsewhere,” “To Organize,” “Dirty Clothes,” and “Clean Clothes.” Systematically work through each section of your room, from the floor to tabletops, placing items into their respective categories. This method helps prevent you from getting sidetracked and ensures that every item is consciously addressed. Remember, the goal is to remove anything that doesn’t serve a purpose, bring you joy, or have a permanent home within your room, laying the groundwork for truly effective DIY room organization.
DIY Laundry Basket: A Stylish Solution for the “Chair Pile” Problem
The infamous “chair, shelf, or corner” where dirty clothes accumulate is a universal struggle, often leading to unsightly piles and a sense of disarray. The video’s solution of creating a super cute yet functional DIY laundry basket is not just practical; it’s an empowering way to tackle a common pain point with creativity. Unlike generic laundry hampers, a personalized basket can actually become a charming piece of room decor, encouraging you to use it rather than letting clothes languish on furniture. The magic lies in making something mundane feel special, transforming a chore into an opportunity for expression.
When selecting a basket, the advice to choose one that isn’t too big is surprisingly insightful. While a massive hamper might seem logical for holding more, it can ironically lead to procrastination in emptying it, defeating its purpose. A medium-sized basket ensures that it fills up more quickly, prompting more frequent laundry cycles and preventing an overwhelming backlog. The customization potential is limitless: from acrylic paints to 3D letters spelling out a funny quote or your initials, this DIY project allows your personality to shine through while addressing a critical organizational need. Imagine waking up to a clean room, knowing every item, even dirty laundry, has an intentional and attractive place.
Upgrading Your Closet: The Velvet Hanger Revolution
Once your clothes are clean, the next step is ensuring they stay organized and well-presented within your closet, a often-overlooked aspect of effective DIY room organization. The frustration of clothes constantly slipping off hangers is a common annoyance that can lead to wrinkled garments and a perpetually messy closet floor. This is where velvet clothes hangers become a game-changer, as highlighted in the video. Their unique flocked surface creates friction, keeping even the silkiest fabrics securely in place, unlike traditional plastic or wire hangers.
Beyond their practical anti-slip properties, velvet hangers also offer a significant aesthetic upgrade. Switching to a uniform set of slim velvet hangers can instantly elevate the look of your closet, making it appear more cohesive and luxurious. Moreover, their slender profile maximizes closet space, allowing you to fit more garments without overcrowding. This seemingly small change can have a profound impact on your daily routine, making it easier to find outfits and maintaining a tidy closet with minimal effort. It’s a testament to how even minor adjustments can contribute significantly to overall room organization and visual appeal.
Dresser Top Transformation: Crafting Cute & Functional Organizers
The dresser top, often a focal point in any room, possesses immense potential for both decorative display and practical storage, yet it frequently becomes a magnet for miscellaneous items. The video offers brilliant DIY solutions to transform this area into an organized and visually appealing space, beginning with the crucial step of clearing and cleaning the surface. This act of starting with a blank canvas is essential for envisioning new possibilities and effectively implementing your DIY room organization strategies. It’s about more than just wiping away dust; it’s about resetting the space.
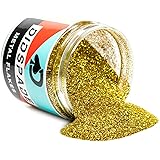
The use of triangle boxes, painted white and accented with marble contact paper, perfectly illustrates how simple craft supplies can be turned into stylish bookends and storage for smaller items like duct tapes and acrylic paints. This technique not only adds a touch of modern elegance but also provides designated homes for frequently used bits and bobs, preventing them from scattering across the surface. Similarly, larger white boxes adorned with wood contact paper and painted lids offer a sophisticated way to store bulkier items, like glitter, keeping them neatly tucked away while maintaining a clean aesthetic. Imagine a dresser top where everything has its place, contributing to a serene and uncluttered atmosphere rather than adding to visual noise.
Nightstand Nirvana: From Clutter to Calm in Minutes
The nightstand, despite its small size, often becomes a repository for everything we grab before bed and forget to put away, quickly escalating into a “night table nightmare.” The video’s quick yet effective transformation of this space underscores the power of targeted organization. Much like starting with the dresser top, the first step involves a ruthless decluttering of trash, empty bottles, and anything that doesn’t belong. This immediate removal of obvious clutter provides instant relief and a clearer view of what needs to be organized.
Utilizing a drawer organizer, even one originally intended for drawers, as an open nightstand caddy is a stroke of genius. This repurposed item creates distinct compartments for must-have essentials like books, glasses, or a clock, preventing them from spreading out. By giving each item a dedicated spot, you ensure that your nightstand remains tidy, functional, and aesthetically pleasing. The video aptly demonstrates that achieving a “nightmare to daydream” transformation can take less than five minutes, highlighting that effective organization doesn’t always require elaborate setups but rather smart, simple solutions for your DIY room organization.
Seasonal Storage Solutions: Maximizing Space with Labeled Boxes
A crucial component of maintaining a perpetually organized room, especially after a thorough spring cleaning, is having a robust system for seasonal and rarely used items. The video intelligently addresses this by incorporating storage boxes for off-season clothes and decor that might be reused later. This strategy not only frees up prime real estate in your everyday storage areas but also ensures that items are protected and easily retrievable when needed. Think of it as creating a well-managed archive for your belongings, rather than a forgotten pile.
The key to successful seasonal storage lies in two simple yet powerful actions: labeling and strategic placement. Clearly labeling each box with its contents (e.g., “Winter Sweaters,” “Holiday Decor,” “Summer Linens”) eliminates the frustration of rummaging through multiple boxes to find what you need. Once labeled, these boxes can be neatly stowed away in closets, under beds, or in dedicated storage areas, out of sight but not out of mind. This approach prevents seasonal items from contributing to daily clutter, allowing your main living space to remain effortlessly tidy and perfectly organized year-round, making your DIY room organization truly sustainable.