Crafting Joy: Engaging DIY Kids Toys for Creative Play
Creating DIY kids toys is a fantastic way to spark imagination, save money, and provide unique play experiences for your little ones. The accompanying video showcases three delightful and practical homemade toys: customizable robot crayons, an engaging cardboard car garage, and vibrant giant chalk. These projects prove that the most cherished toys often come from a parent’s creativity and a few simple supplies, transforming everyday items into extraordinary playthings.
Engaging children in creative play with homemade toys not only keeps them entertained but also supports their developmental milestones. Research consistently highlights the benefits of open-ended play, where children lead the narrative and interact with versatile objects. This fosters problem-solving skills, encourages imaginative storytelling, and enhances fine motor coordination, making DIY kids toys an invaluable addition to any playroom.
Melted Magic: Crafting Custom Robot Crayons
One of the most appealing DIY kids toys featured in the video is the custom robot crayons. This project is incredibly versatile and allows for endless creativity, enabling you to design crayons in any shape or color combination your child desires. The process begins with gathering old or broken crayons, making this an excellent upcycling project that gives new life to forgotten art supplies. Simply peel the paper from your chosen crayons and break them into smaller pieces.
For best results, sort the crayon pieces by color into flexible, oven-safe bowls. This step makes pouring into molds much easier later on. The narrator recommends baking these crayon pieces at 350 degrees Fahrenheit for approximately 10 to 15 minutes, or until completely melted. Stirring the melted wax with separate popsicle sticks for each color ensures a smooth consistency. This careful preparation is key to achieving perfectly formed, vibrant crayons.
Once the crayons are fully melted, pour the liquid wax into silicone molds. The video demonstrates using robot molds, which instantly transform ordinary crayons into fun characters for play. However, you can use any mold shape—from hearts and stars to animals or even favorite movie characters—to customize your child’s coloring experience. Experiment with solid colors or create two-tone effects by layering different colors, like the red, orange, and green combination shown, which adds an exciting surprise when the crayons are used.
Allow the newly poured crayons to dry completely for about six hours. Once solid, they pop out of the molds easily. The narrator’s son loved playing with his robot crayons as “little guys” before using them for coloring, highlighting the dual purpose of these clever DIY kids toys. These custom crayons are not only fun for at-home coloring but also surprisingly durable for travel, making them a fantastic, mess-free option for trips and outings. Storing them in a Ziploc bag keeps them contained and ready for their next adventure.
Build & Play: Your Child’s DIY Cardboard Car Garage
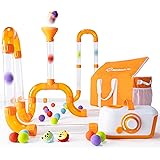
For children obsessed with cars, a DIY kids toys cardboard car garage is an absolute must-try project. Inspired by popular Pinterest ideas, this craft utilizes a simple old shopping box, transforming it into a multi-level parking structure for toy vehicles. While some DIY garages can be quite elaborate, the beauty of this project lies in its simplicity and the ability to customize it to your child’s specific interests and your available materials.
To start, seal the bottom of your chosen cardboard box with tape, then cut off the top flaps. The narrator humorously notes that cutting cardboard can be more challenging than expected, so having sharp scissors or a utility knife is advisable. The next step involves building the internal structure, which can include a top parking level and a ramp leading to a lower level or exit. For structural support and visual appeal, consider incorporating recycled toilet paper rolls. These can be used as pillars or to create distinct parking spaces, adding both stability and creative flair to your cardboard crafts.
Constructing the ramp is crucial for interactive play. Secure it with strong tape or hot glue, especially if you anticipate enthusiastic play. Using a Sharpie, draw parking spaces, directional arrows for entry and exit, and even create signs for “P” for parking, “Enter,” and “Exit.” This adds a wonderful educational element, introducing young children to basic signs and spatial awareness. The narrator’s experience highlighted a key learning: reinforce the structure with extra tape or glue, especially at stress points, to ensure the garage withstands vigorous play for more than just a “few days.”
This DIY kids toys garage offers incredible opportunities for imaginative games. Children can drive their cars up and down ramps, park them in designated spots, and create elaborate scenarios. It encourages storytelling and role-playing, which are vital for early childhood development. Plus, using an old box makes this a wonderfully budget-friendly craft, proving that engaging play doesn’t require expensive store-bought items.
Big Fun, Big Chalk: Making Homemade Outdoor Chalk
Another fantastic outdoor DIY kids toys idea is making giant homemade chalk. This project is perfect for encouraging outdoor fun and creative expression on sidewalks and driveways. The main components are non-toxic plaster of Paris, water, non-toxic paint, and recycled toilet paper rolls as molds. This brilliantly simple method ensures chunky, easy-to-grip chalk that toddlers can handle with ease.
Begin by preparing your toilet paper roll molds. Tape off one end of each roll securely to prevent the liquid plaster mixture from leaking out. The narrator emphasizes the importance of a good seal here. For the inner lining, cut wax paper to fit snugly inside each roll, creating a non-stick barrier that helps with easy removal later. This preparation step ensures that your giant chalk sticks come out perfectly formed and smooth.
Next, mix the non-toxic plaster of Paris with water according to the package directions or the specific measurements provided in the video description. This creates the base for your chalk. Once the plaster is mixed, divide it into separate bowls, and add a few drops of non-toxic paint in your desired colors. The narrator made orange, pink, blue, and yellow chalk, but you can choose any vibrant hues to create a colorful palette for your child’s artistic endeavors. Stir each color thoroughly until evenly mixed.
Carefully pour the colored plaster mixture into the prepared toilet paper roll molds. Allow them to dry overnight to ensure complete hardening. In the morning, gently remove the tape and the toilet paper roll. Any small bits of wax paper that stick can be carefully peeled off. The result is substantial, vibrant chalk sticks that are perfect for drawing, doodling, and creating large-scale art outdoors. This DIY kids toys project not only provides endless entertainment but also introduces children to basic chemistry principles in a fun, tangible way.
Beyond the Craft: The Benefits of Homemade Toys
The value of DIY kids toys extends far beyond the moment of creation. Engaging in these types of craft projects with your child creates lasting memories and fosters a sense of accomplishment. When children help make their own toys, they develop a deeper appreciation for the items and often engage in more meaningful play. This involvement from creation to play strengthens their connection to the object and the activity.
Furthermore, homemade toys often encourage more creative play than many store-bought alternatives. A simple cardboard garage or a custom crayon allows children to impose their own narratives and uses, rather than being limited by predefined features. This type of open-ended play is crucial for cognitive development, stimulating abstract thinking and imagination. It’s a wonderful way to offer screen-free fun and encourage children to use their ingenuity.
From a practical standpoint, DIY kids toys are incredibly budget-friendly crafts. Utilizing recycled materials like cardboard boxes, old crayons, and toilet paper rolls demonstrates resourcefulness and teaches children about sustainability. It also allows parents to provide a constant stream of novel playthings without breaking the bank, a significant advantage for families looking to manage expenses while still providing enriching experiences.
The sensory experience is another key benefit. Handling plaster, mixing colors, and feeling the textures of different materials involved in making these DIY kids toys contribute to sensory play. This is vital for young children as they explore the world around them. Additionally, tasks like peeling crayon paper or carefully pouring liquids improve fine motor skills and hand-eye coordination, offering developmental advantages disguised as fun activities.
Tips for Successful DIY Toy Making
When embarking on DIY kids toys projects, a few practical tips can enhance your experience. Always prioritize safety, especially when working with younger children. Ensure all materials, like the plaster of Paris and paints for the chalk, are non-toxic. Supervise closely during activities involving cutting or baking, and keep a watchful eye on little hands around hot materials.
Embrace imperfection; the goal is the joy of the process and the unique outcome, not a flawless product. The narrator openly shares her “miserable fails” in other videos, emphasizing that children appreciate the effort and the opportunity to play, regardless of perfection. This mindset reduces pressure and makes the crafting experience more enjoyable for both parent and child. Children often find unique beauty in handmade items, even if they aren’t “store-perfect.”
Involve your child in the process as much as possible, tailored to their age and abilities. For example, older toddlers can help sort crayons by color or stir the plaster mixture with supervision. This involvement boosts their sense of ownership and excitement for the finished DIY kids toys. It transforms a solo crafting project into a shared, enriching activity that strengthens your bond and encourages their creativity.
Finally, consider the durability of your creations, especially for items like the cardboard car garage. As the narrator discovered, sometimes a simple tape job isn’t enough for vigorous play. For future projects, reinforce key structural points with stronger adhesives like hot glue or additional layers of cardboard. Thinking ahead about how your child will interact with the DIY kids toys can help you design them for maximum longevity and enjoyment.