Transform Your Small Kitchen: An Affordable DIY Makeover Guide
There are few things as frustrating as living with a space that just doesn’t feel like “you.” Perhaps you’ve found yourself staring at an outdated kitchen, dreaming of a brighter, more modern aesthetic, but the thought of a full-scale renovation budget is enough to make you sigh. If you’ve been in this situation, you are certainly not alone. Many homeowners grapple with the desire for a refreshed kitchen without the hefty price tag associated with professional overhauls. The good news is, as seen in the video above, a stunning transformation is entirely possible through strategic, budget-friendly DIY projects.
This comprehensive guide delves into the specifics of undertaking a
DIY small kitchen makeover
, focusing on impactful changes like cabinet painting, floor resurfacing, and intelligent organizational strategies. You will find that with a little effort and the right approach, your kitchen can be revitalized into a space you genuinely love.The Foundation: Comprehensive Kitchen Prep and Organization
Before any paint can be applied or new hardware installed, the kitchen must be meticulously prepared. This initial stage, while often tedious, is paramount for the success and longevity of your makeover. A thorough deep clean, as demonstrated in the video, is always recommended. All surfaces should be washed with soap and water to remove grime, grease, and general build-up. Additionally, all cabinet doors and drawers are advised to be removed, which also provides an opportune moment for a significant decluttering and reorganization effort. It is often surprising how much unused or redundant kitchenware can accumulate over time.
Moreover, during the removal of cabinet doors and drawers, it is highly beneficial to label each piece. This simple step, which involves assigning a number or code to both the door/drawer and its corresponding cabinet opening, will undoubtedly save considerable time and frustration during reassembly, particularly in larger kitchens. This practice ensures that each piece is returned to its original, perfectly fitting location.
Tackling Unexpected Obstacles: The Adhesive Challenge
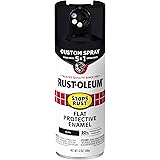
One common hurdle encountered in older homes, as highlighted in the video, is dealing with remnants from previous owners. In this particular instance, stubborn baby-proofing adhesive was found on the cabinets. While standard cleaning methods such as soap and water or even Goo Gone might be attempted, sometimes a more robust approach is required. A sharp edge, carefully used, was ultimately found to be effective in scraping off the dried adhesive, aiming to create as flat a surface as possible for subsequent painting. This illustrates the importance of patience and adaptability when unexpected “bumps” arise in a DIY project.
Revitalizing Cabinets: Painting for a Modern Look
Painting kitchen cabinets is perhaps one of the most impactful and budget-friendly ways to update a kitchen’s appearance. The transformation from an aged, unloved look to a bright, modern aesthetic can be truly astonishing. The process, however, is detailed and requires careful attention to each step.
Surface Preparation: Liquid Sandpaper & Deglossing
Proper cabinet preparation is essential for paint adhesion and a smooth finish. After initial cleaning, a crucial step involves degreasing and deglossing the cabinet surfaces. While traditional sanding can achieve this, a time-saving alternative, like the Clean Strip liquid sandpaper mentioned in the video, can be employed. This product is specifically designed to remove the shine and greasy residue, creating a surface that primer can effectively bond to. For around $5, this product was found to be surprisingly effective, saving significant time compared to manual sanding. When using such products, it is generally recommended to apply it with an abrasive pad, like Scotch-Brite, and ensure any excess liquid is gently wiped away. The instructions for liquid sandpapers often advise against wiping off the slight residue before priming, as this can enhance adhesion.
Priming for Success
Following deglossing, the application of a high-quality primer is non-negotiable. The Kilz Original Low Odor Interior Primer, a stain-blocking variety, was chosen in this makeover. Primer serves multiple vital functions: it blocks existing stains from bleeding through the new paint, provides a uniform base color, and greatly enhances the adhesion of the topcoat. For older cabinets, two coats of primer are often beneficial, ensuring complete coverage and maximum protection against bleed-through.
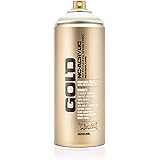
Choosing the Right Paint and Application Method
For the cabinet topcoats, the ProClassic Interior Acrylic Latex Smooth Enamel Finish in a satin sheen was selected. Enamel paints are highly recommended for cabinets due to their durability, smooth finish, and resistance to chipping and moisture. The satin finish provides a subtle sheen that is easy to clean and hides minor imperfections better than a high-gloss finish.
While painting cabinets with brushes and rollers is certainly an option, a paint sprayer, such as the HomeRight Finish Max Super, can achieve a professional, virtually brushstroke-free finish. This method can save considerable time, particularly for numerous cabinet doors. When using a sprayer, it is critical to consult the paint manufacturer’s instructions regarding thinning requirements; some paints, like those used here, may not require thinning for sprayer application. Additionally, always wear appropriate personal protective equipment, and ensure adequate ventilation. A key learning from the video was the challenge of cleaning oil-based paint from a sprayer; always check if your paint is oil or water-based, and clean the sprayer immediately with the correct solvent or water after use to prevent clogging and damage.
Flooring Transformation: Painting for a Fresh Look
Beyond cabinets, the kitchen floor offers another significant area for a budget-friendly facelift. Instead of costly tile or hardwood replacement, painting existing floors can provide a dramatic aesthetic change.
Valspar Porch and Floor Paint: A DIY Solution
In this
small kitchen makeover on a budget
, Valspar porch and floor paint in a light gray was utilized. This type of paint is specifically formulated to withstand heavy foot traffic and is designed for both interior and exterior use, making it suitable for kitchen environments. While pre-mixed colors are available, many brands also offer tinting services, allowing you to choose a custom shade that perfectly complements your new cabinet color.Application involves careful preparation, typically including thorough cleaning and potentially a light sanding if the existing floor surface is glossy. Applying paint while wearing socks, as suggested, can help prevent scuff marks or shoe prints on the wet surface. It is important to apply multiple thin coats, allowing adequate drying time between each, followed by a poly seal for enhanced durability. While a lighter color can undeniably brighten a space, it is worth noting that it may also show pet hair, crumbs, and dirt more readily, requiring more frequent cleaning. The long-term durability of painted floors can vary, and periodic touch-ups may be needed, as will be seen in follow-up updates.
Enhancing Functionality and Style: Custom Touches
A true
budget-friendly kitchen renovation
often extends beyond just painting. Adding custom features and strategic design elements can significantly elevate the space, as demonstrated by several projects in the video.Floating Shelves and Bar Area
The addition of floating shelves is a fantastic way to introduce open storage and display opportunities, breaking up the visual monotony of all-enclosed cabinetry. These shelves, once sanded and sealed (or stained), become stylish features, providing space for cookbooks, decorative items, or frequently used dishware. Furthermore, the creation of a small counter/bar area, designed to accommodate three bar stools, transforms an unused wall into a functional eating and gathering space. Sourcing pieces like this from platforms such as Facebook Marketplace (an IKEA piece in this case) is an excellent way to keep costs down while repurposing furniture.
Peel-and-Stick Wallpaper: Instant Texture
For an added layer of texture and visual interest, peel-and-stick wallpaper is a DIYer’s dream. This affordable and easily reversible option, like the variety found at Target, allows for a quick and significant change to a wall. Application is often straightforward, typically taking about an hour for a smaller section, involving careful measurement and cutting around obstacles like outlets. While generally user-friendly, it is wise to purchase an extra roll or two, as occasionally a defective roll might be encountered, requiring a replacement.
New Hardware and Lighting
The smallest details can make a huge impact. Swapping out old cabinet knobs and pulls for new, modern designs, like the Amazon pulls purchased for approximately $20 for a pack of 20, immediately updates the look of the cabinets. Additionally, the plan to remove an upper cabinet above the sink and replace it with a wall sconce exemplifies a smart design move. This creates a focal point, enhances lighting in a crucial work area, and contributes to an airier feel in a small kitchen. This step often requires some minor drywall repair and potentially electrical work, ensuring holes are filled with wood filler and sanded smooth before painting for a seamless finish.
The Continuous Journey of a DIY Makeover
A